Claris Studio data inheritance
When building custom views, it's important to understand the visual hierarchy, data hierarchy, and the different ways you can use table, field, and record data to control what you see and where.
In Claris Studio, there are three primary layers of data:
-
View, Subview, and Frame
Note A view can have a maximum of three frames, and a frame can only display one subview at a time. From a data perspective, frames and views are effectively the same layer.
-
Object group
-
Individual object
The source data for a custom view—a table—is inherited by all object groups on that view or subview, and then by all objects in those object groups. However, you have control over what data is powering each of these components by adjusting data configuration options in the Properties pane > General tab > Data and Records section.

Note Available options vary depending on the selected object.
Views
When you first create a view, an associated table is created unless you specify an existing table. Initially, the new table will have no fields or records in it, but when you add fields and enter records, they'll be added to the table.
Important By default, the table created for the view is the source for all subviews, groups, data controls, and the Add Object menu unless otherwise specified.
Subviews
In addition to the table that's created when you first create a custom view, a subview—a high level object container—is created and displayed in the main frame of the view.
You can create multiple subviews and configure each individually as you would a regular view.
It's important to note that everything currently inside a frame is what constitutes a subview. If you change the subview or create a new one in a frame, the contents of the entire frame will change.
Frames
Used primarily to arrange sections of your view, frames display a chosen subview.
With calculations, button actions, and multiple subviews, you can dynamically show different subviews and update frame content as your users interact with the view.
See Using frames.
Groups
A group is a container for objects that inherits record data from the subview its placed on. You can also set groups to have no record data source, or you can use a calculation to determine the view or table to use to power fields in the group.
See Group object.
Fields
For most fields, you can set a table, a field from that table, and whether record data is inherited or determined by a calculation. By default, a new field will use the inherited table and corresponding field, but you can connect it to a different field in a different table and use a calculation to set the record data.
See Fields.
Data controls
When you create a custom view, a status toolbar is placed at the top of the initial subview, and you can use this toolbar to navigate records like you would in FileMaker Pro. You can change the source of this and other data controls to use any table you have access to in your hub. For example, you can have two status toolbars in the same subview—one with a "Jobs" table as its source and the other with a "Clients" table as its source—so you can view records from both tables in the same place.
See Data controls.
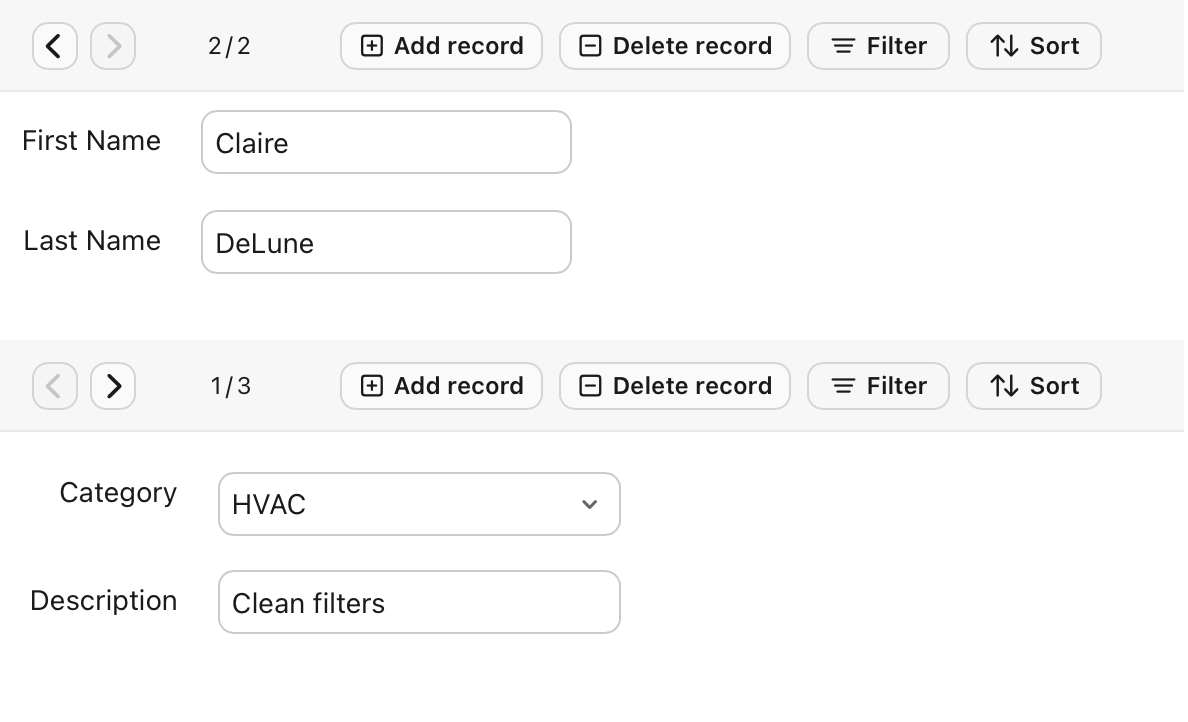
Notice how each status toolbar is controlling different sets of records.
Summary objects
For all summary objects, you can choose any table in the hub as its data source.
See Summary objects.
Static objects
The only static object that can be powered by data is the Text Block object, which can be set via a calculation.
See Static objects.
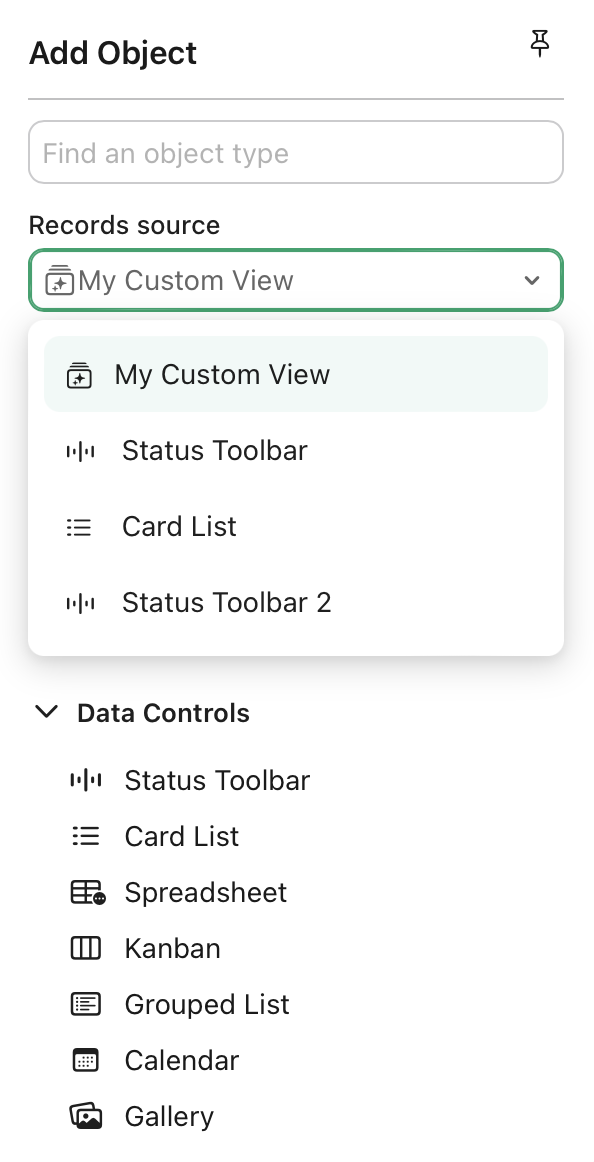
Add Object menu
When you open the Add Objects menu, you'll notice a "Records source" menu. By default, when you add fields to the view, it will use the initial table as the source, meaning new fields will be added to that table and existing fields will show data from records in that table. However, after you've added another data control, for example a card list, you can use that as the source when adding fields. When you add fields with the card list as the data source, the fields will show data from records selected in the data control itself rather than from the table.
Calculations
If you had the Properties pane open when you first created the view, you may have noticed the fields Record data and Calculate record ID from in the Data and Records section. With the frame selected:
-
If Record data is set to None, fields in the frame are effectively disconnected from any table.
-
If Record data is set to From Calculation, fields in the frame are controlled by the target of the calculation.
By default, Record data is set to From Calculation, and Calculate record ID from is set to the calculation below:
'SubviewName'.statustoolbar.selectedItem.recordID
Where
'SubviewName' is the name of the current subview.
statustoolbar is the object name of the status toolbar in the subview.
Note The object name can be accessed by going to Properties panel > Automation tab > View Object Name with the object selected.
selectedItem is the record currently selected by the data control (for example, the "1" in "1/2").
recordID is the internal ID of the given record.
Note This is the same value returned by the GET(RecordID) function.
This calculation uses the record currently selected by the status toolbar in the current subview to determine what content is shown in fields in that view. For example, let's say we have two fields in a subview—Name and Job Category—and two records:
| Record ID | Name | Job Category |
|---|---|---|
| 1 | Johnny Appleseed | Maintenance |
| 2 | Claire DeLune |
Electrical |
If record 1 of 2 (1/2) is selected by the status toolbar, the "Name" field will show "Johnny Appleseed" and the "Job Category" field will show "Maintenance."
You can use calculations in custom views to specify which data control to use to determine the content of fields in a subview, the value of individual fields, and how records are filtered in data controls.