Setting up Claris Studio and Claris Connect
Note The following information is for license owners and team managers.
Before users with an eligible Claris FileMaker license can use Claris Studio and Claris Connect included with their license, the license owner must first set up access. The license owner is the person whose email address is associated with the purchase agreement.
Eligible FileMaker Server licenses associated with the Claris Partner Program, Claris resellers, or Site licenses don't appear in Claris Customer Console. These license owners can set up access in FileMaker Server Admin Console instead.
To set up Claris Studio and Claris Connect:
-
Do one of the following:
If you use Do this FileMaker Cloud
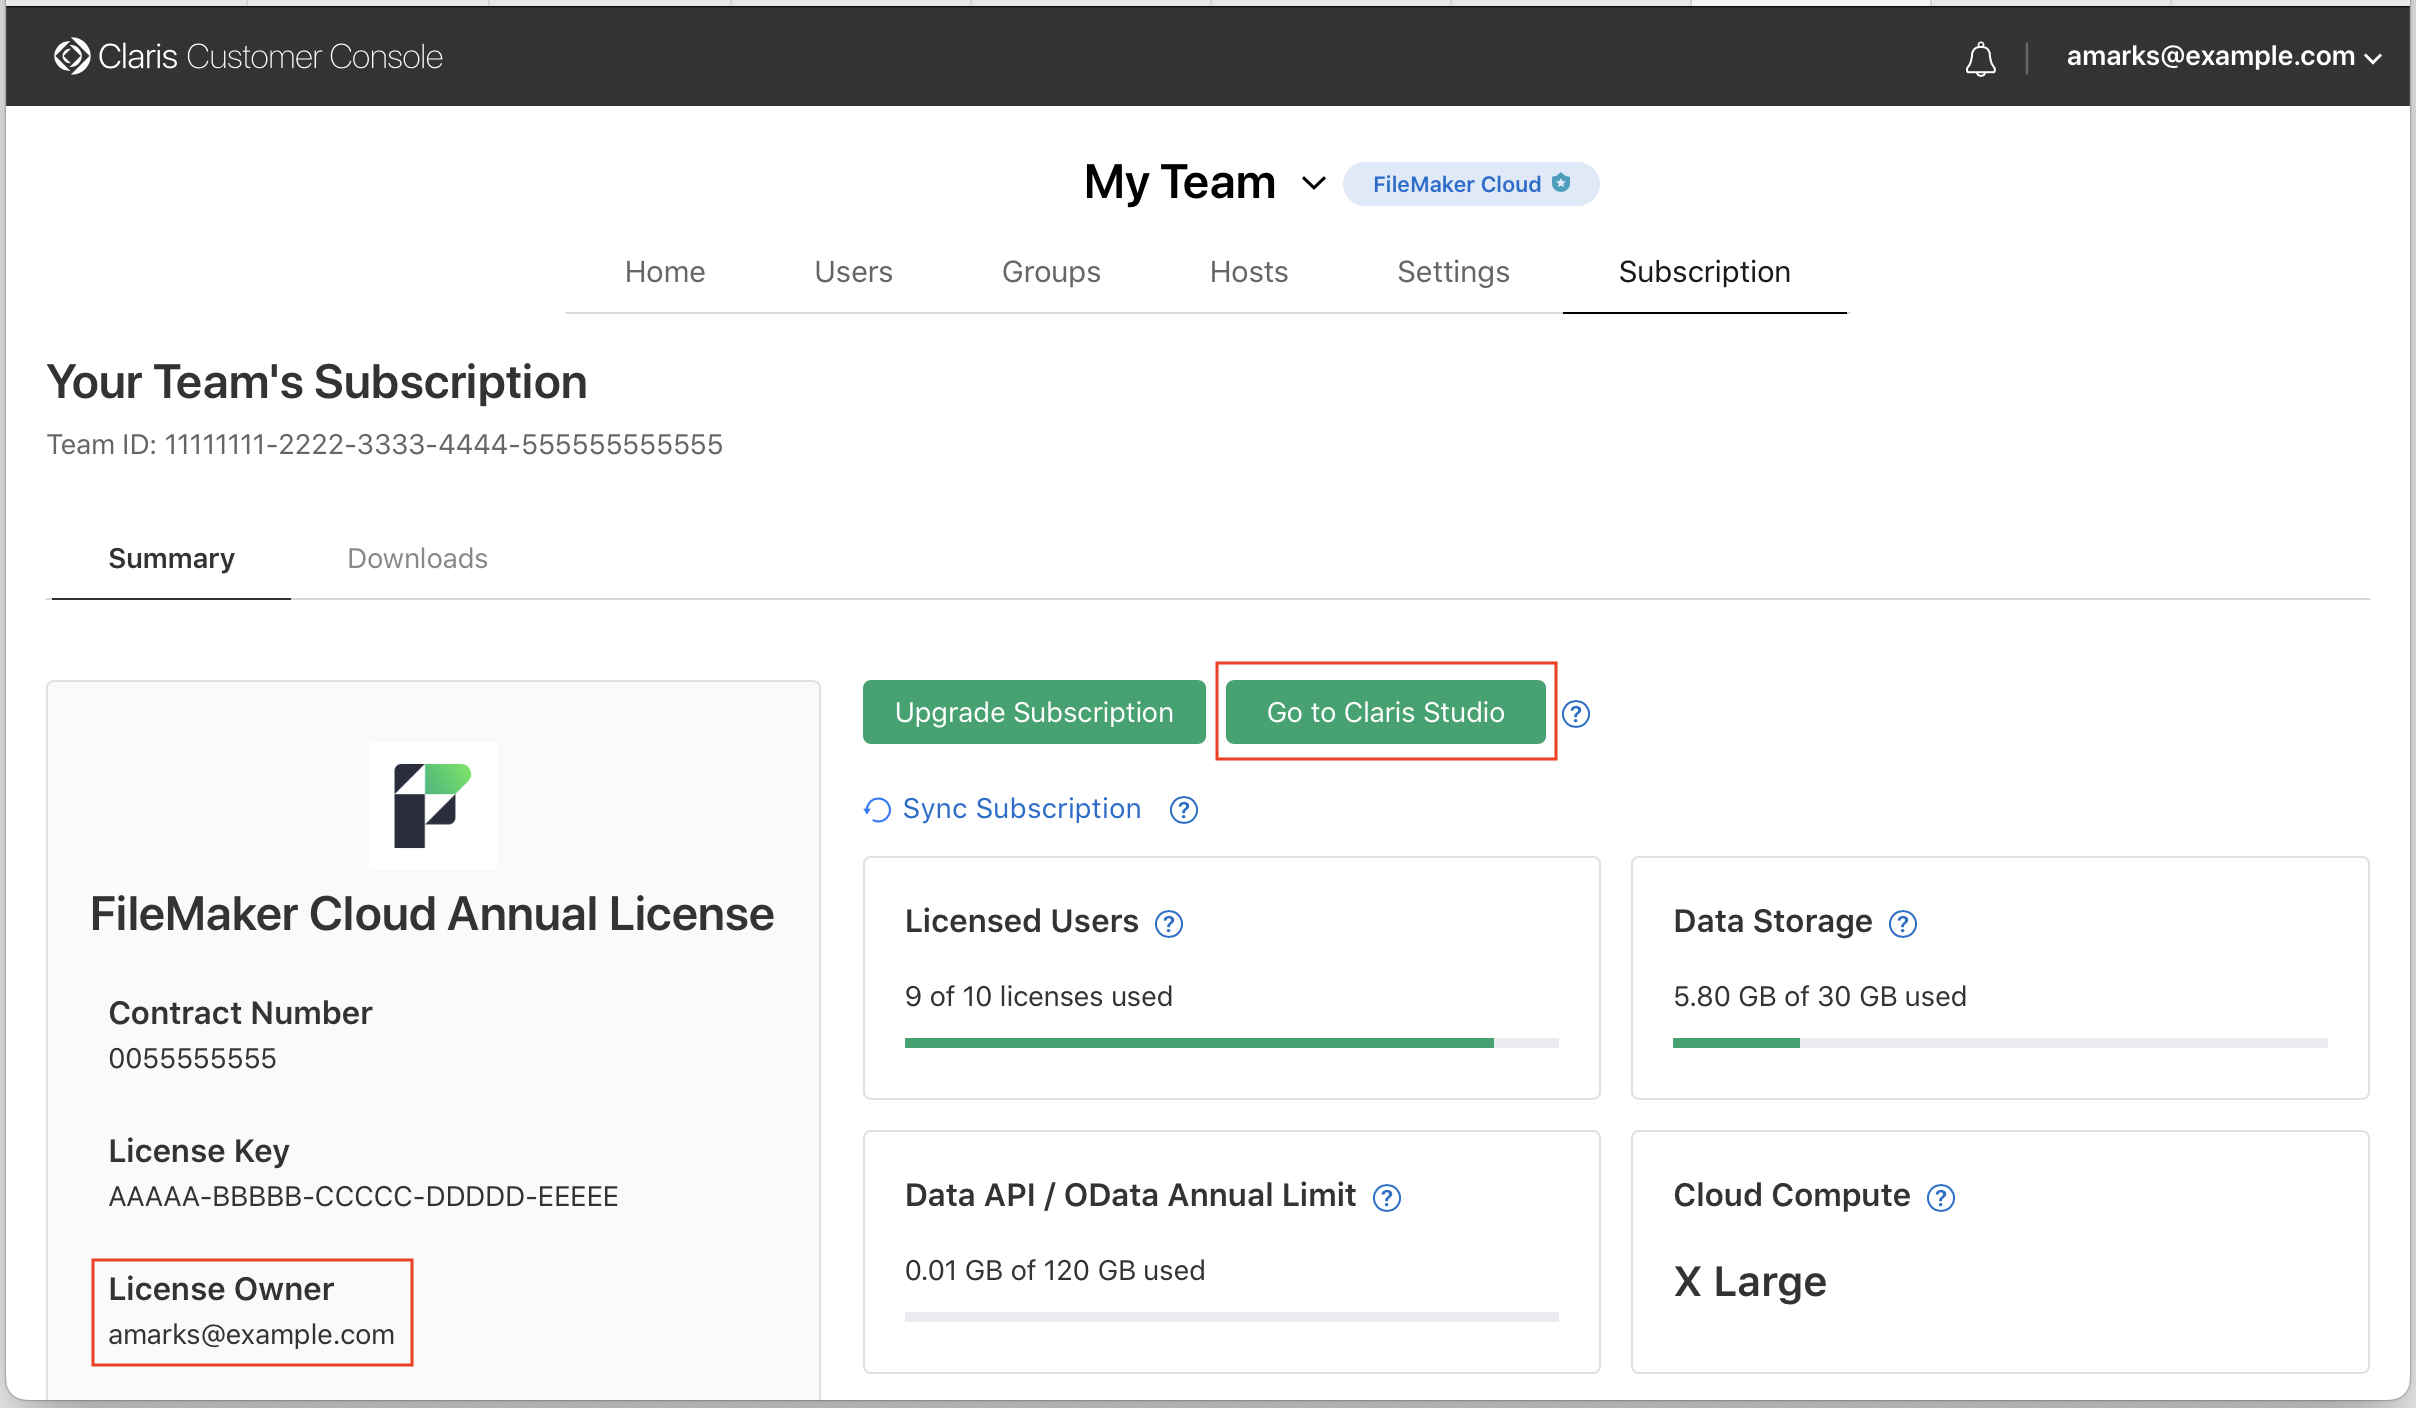
Note You must be the team's license owner and a team manager. If you're a team manager and don't know who the license owner is, the license owner's email address is on the Subscription page (shown below).
-
Go to my.claris.com and sign in to Claris Customer Console with your Claris ID.
You must sign in with the license owner's email address.
-
In Claris Customer Console, click the Subscription tab.
-
Click Go to Claris Studio. This link is available only to the license owner.
When the Claris Studio Sign In dialog opens, the license owner's email address is already filled in.
FileMaker Server
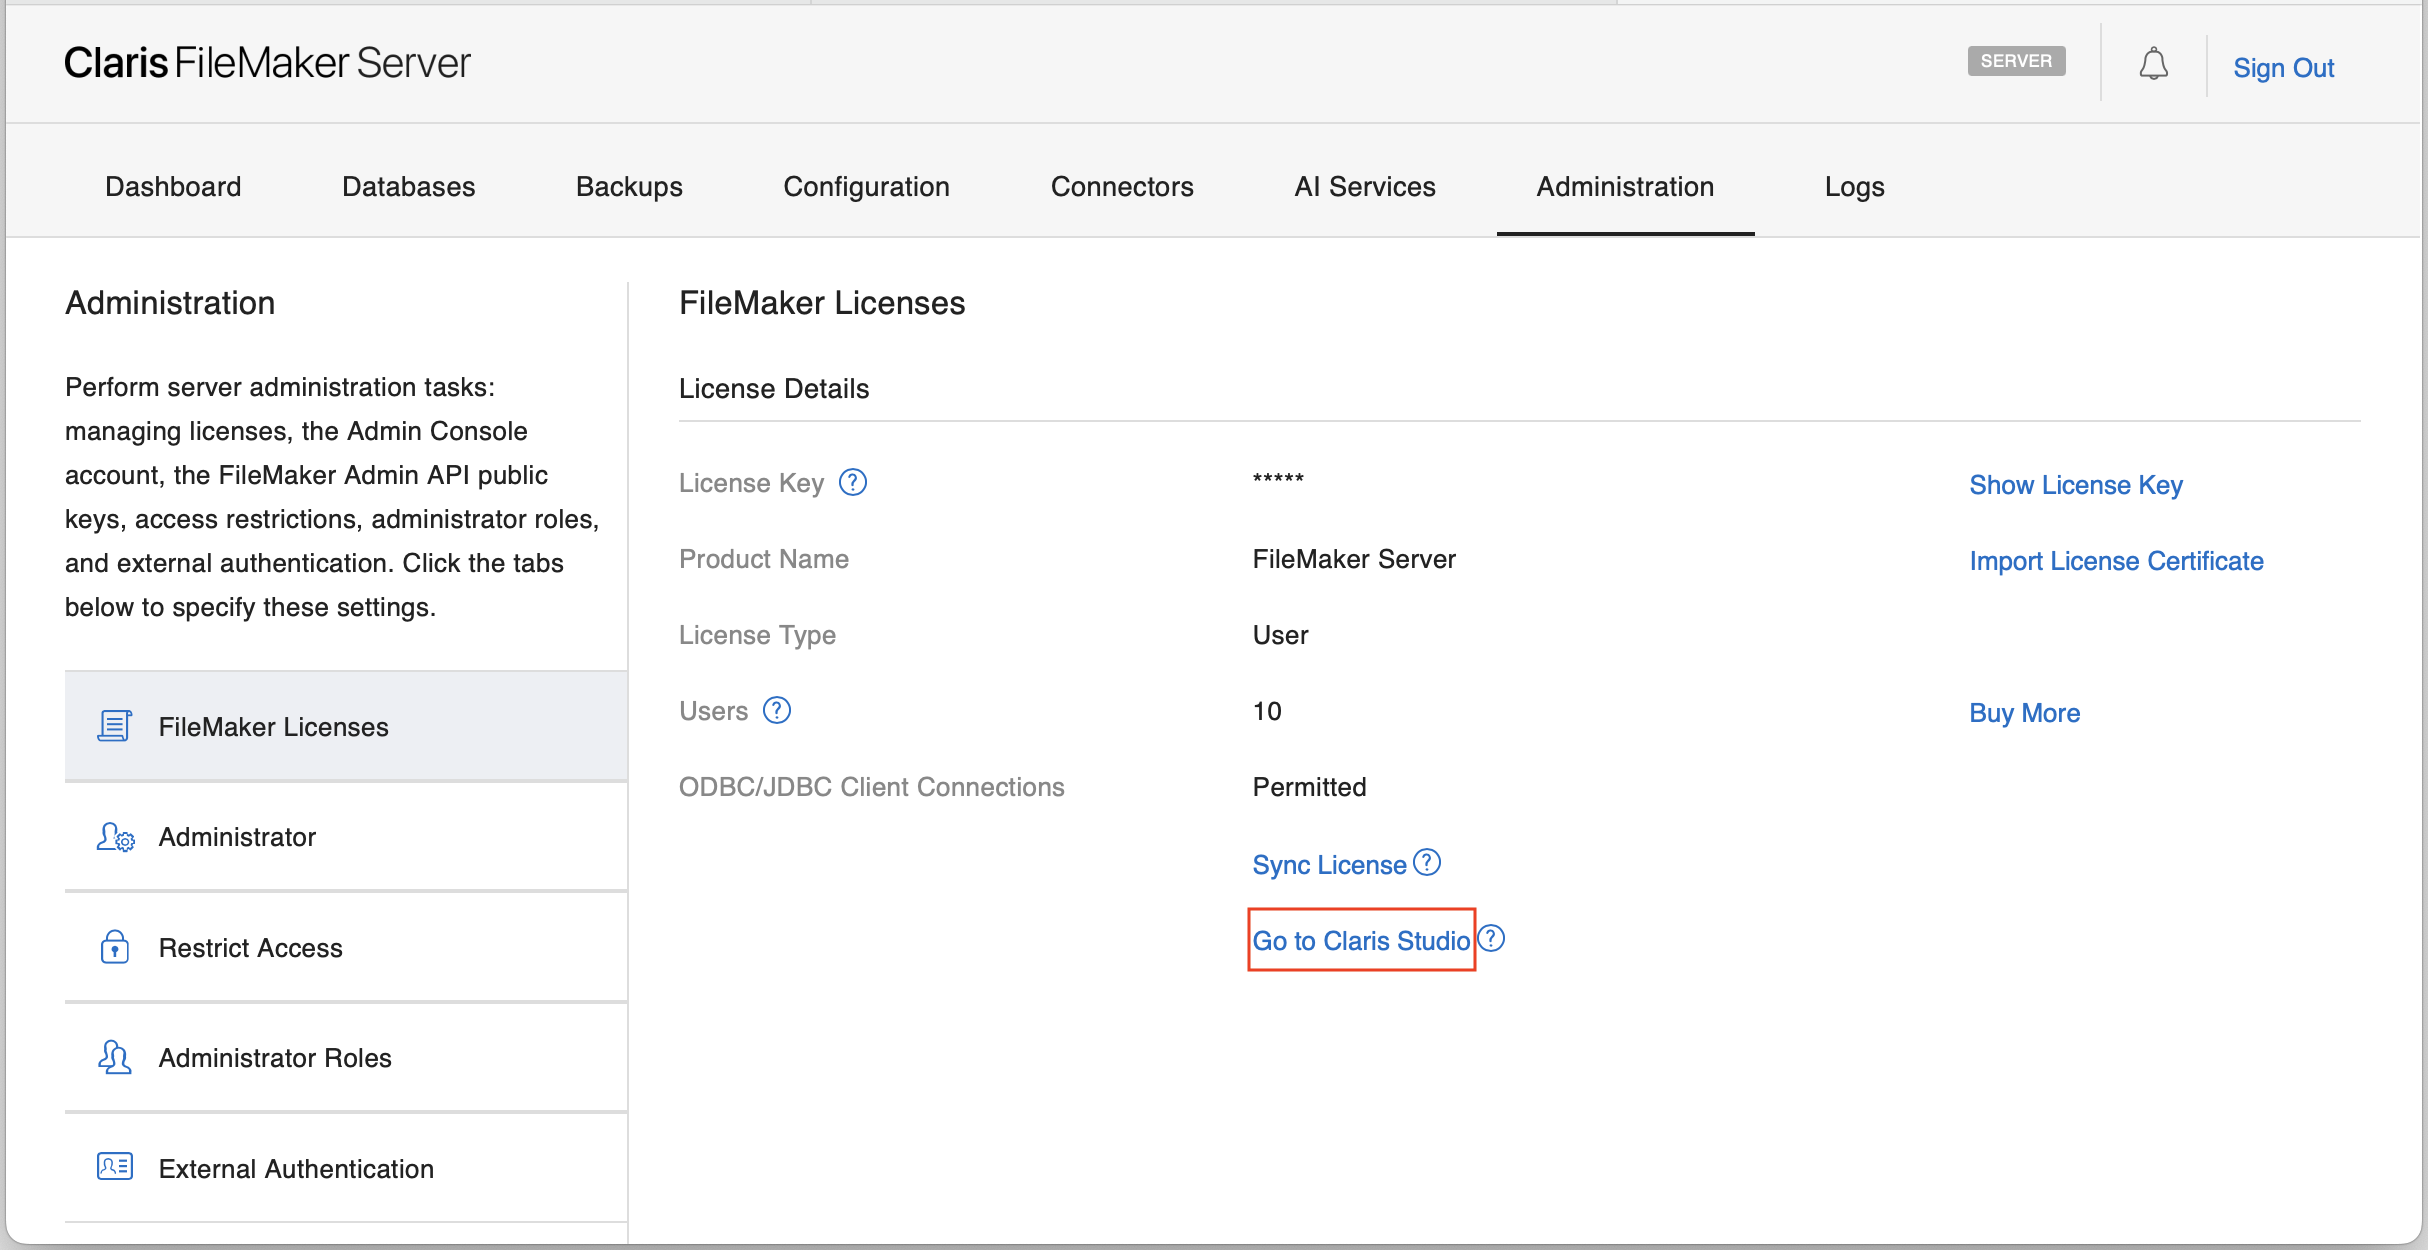
(starting with version 2025)Note You must be the server administrator (not a user with an administrator role) and the license owner. If you're the server administrator and don't know who the license owner is, the license owner's email address is shown in the sign-in dialog after you click Go to Claris Studio (see below).
-
Open FileMaker Server Admin Console and sign in as the server administrator.
See Starting Admin Console in FileMaker Server Help.
-
In Admin Console, click the Administration > FileMaker Licenses tab.
-
Click Go to Claris Studio.
When the Claris Studio Sign In dialog opens, the license owner's email address is already filled in.
-
-
In the Claris Studio Sign In dialog, the license owner must enter their password, then click Sign In.
-
Follow the on-screen instructions.
When you're done, you're in Claris Studio on the Hubs page.
Claris Studio and Claris Connect are now set up. This process creates a new team associated with your license.
Next steps
-
License owner: Invite users to your team in Claris Studio. As the license owner, you are also a team manager by default, so you can invite others and promote one or more of them to team manager. If you're setting up Claris Studio and Claris Connect primarily for others to use, be sure to invite at least one of them and make them a team manager.
See Invite users to a team and Promote a team member to manager in Claris Studio Help.
-
Team manager: If you already have a Claris Connect team, you can move projects from that team to the new team managed in Claris Studio. For users in your existing Claris Connect team to access projects in your new team, you'll need to invite them to your new team in Claris Studio.
See Move a project in Claris Connect Help.
-
To return to Claris Studio later, go to platform.claris.com.
-
To go to Claris Connect:
-
In Claris Studio on the Hubs page, click
 Connections.
 -
Or go to connect.claris.com.
-
Notes
-
If you can't identify the license owner from their email address in the sign-in dialog as described above, check with your IT or procurement department, or contact Claris Support.
-
If you use Claris Customer Console to manage your eligible FileMaker Server license, you can use either Claris Customer Console or FileMaker Server Admin Console to set up access in step 1 above.
-
For your Claris Studio and Claris Connect team, the users, groups, and external identity provider (IdP) settings are managed in Claris Studio. If you also have a FileMaker Cloud subscription, another team with a separate set of users, groups, and external IdP settings for FileMaker Cloud is managed in Claris Customer Console.
-
To change their profiles, users must go to Claris Customer Console. See Changing your profile.

